PBR 텍스처로 질감 표현하기
블렌더 텍스처 무료 사이트
Poly Haven • Poly Haven
The Public 3D Asset Library
polyhaven.com
ambientCG - CC0 Textures, HDRIs and Models
Free 3D Assets Never Looked This Good! Get 2000+ PBR Materials, HDRIs and more for free under the Public Domain license.
ambientCG.com
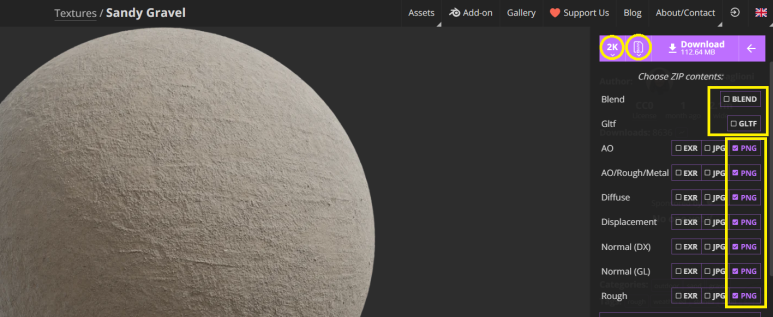
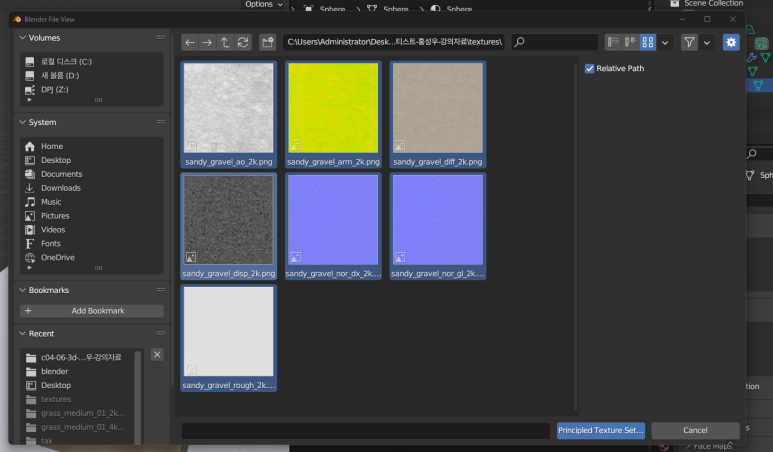
PBR 텍스처 파일 내려받는 방법
2K, Zip
BLEND, GLTF 체크 해제
png 체크
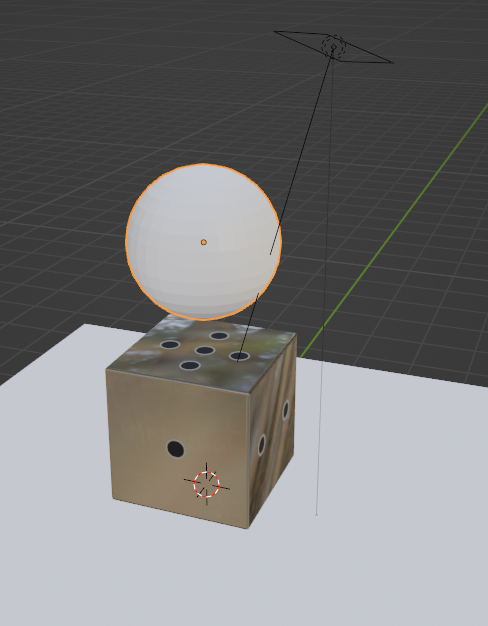
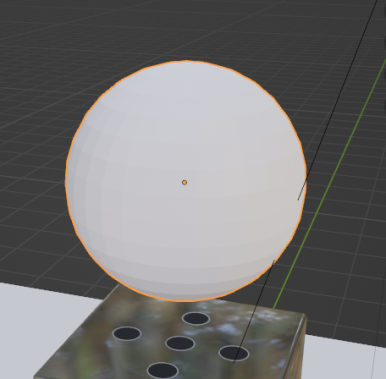
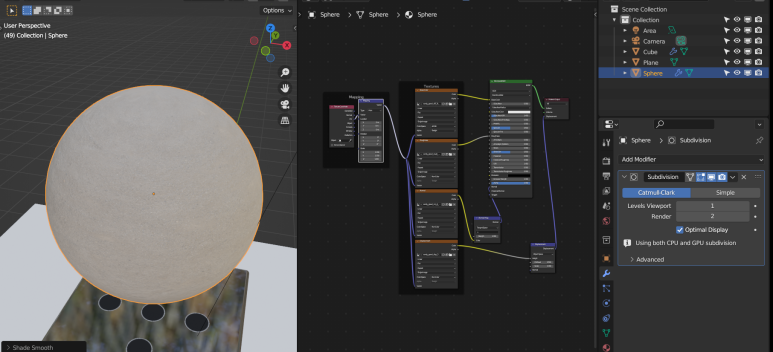
기본 도형 만들기
[Shift]+[A] -> Mesh -> UV Sphere
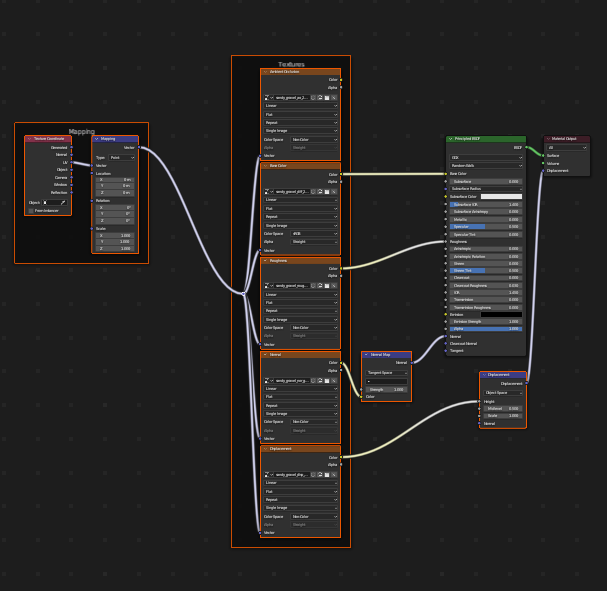
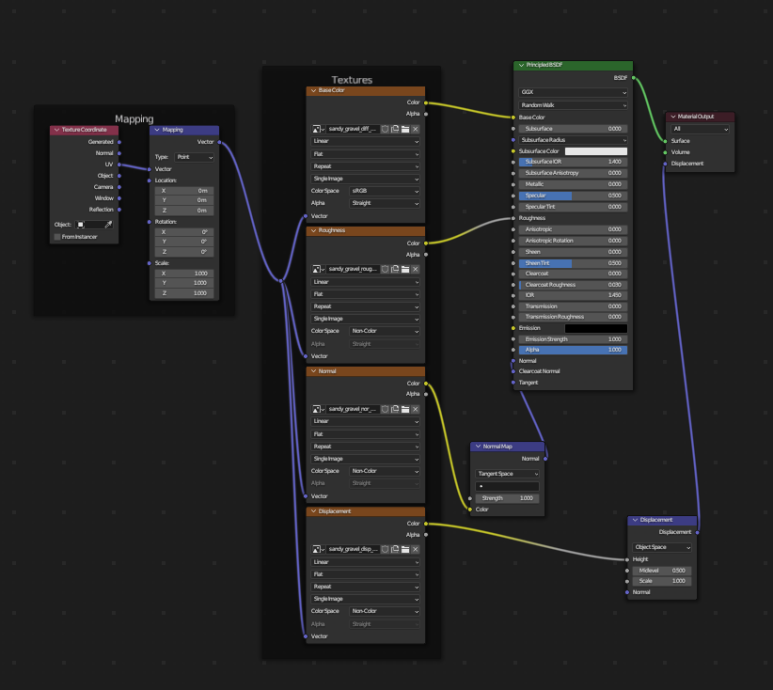
Node에서 PBR 텍스처 추가 하는 방법
Shader Editor에서 +New
Material 이름 Sphere로 변경하기
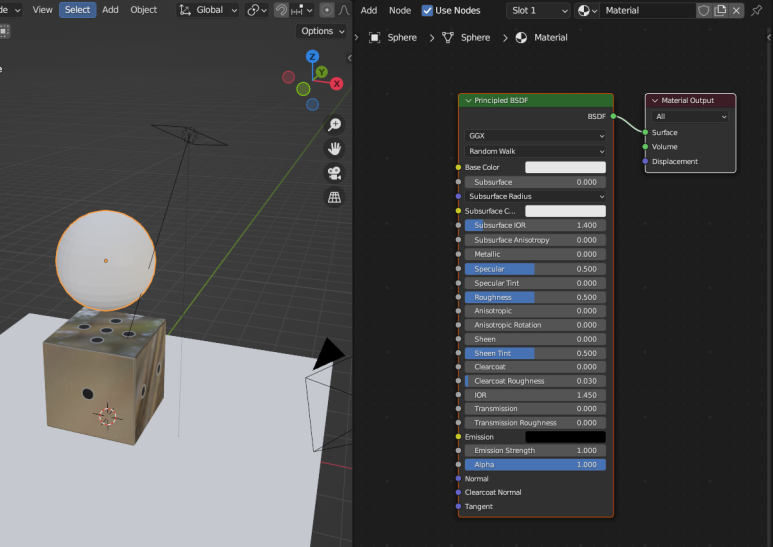
Node Wrangler로 PBR 텍스처
한 번에 자동으로 연결하는 방법
Shader Editor 창에서
Principled BSDF 패널 누르고
[Ctrl]+[Shift]+[T]
파일 경로 찾아들어가서 [A] 전체선택 후 열기
전후 비
쓰지않는 창은 [X] 닫아주기
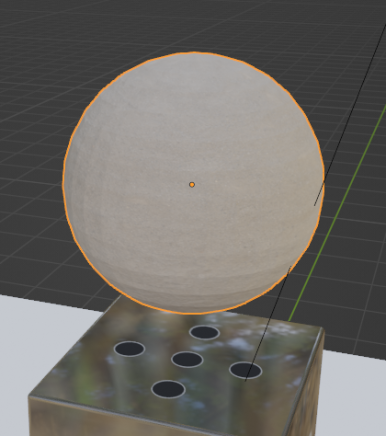
Sphere 모양
Subdicision Surface & Shade Smooth로
매끈하게 만들어주기
디테일한 질감 표현하는 방법
Shader Editor에서 Mapping-> Scale
XYZ 한번에 드래그해서 전체 선택 후 조절
표면 거친 느낌 조절 가능
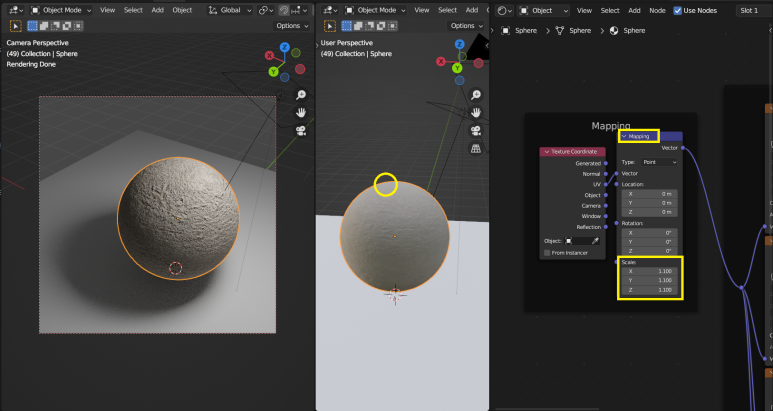

프로퍼티창에서도 확인 가능
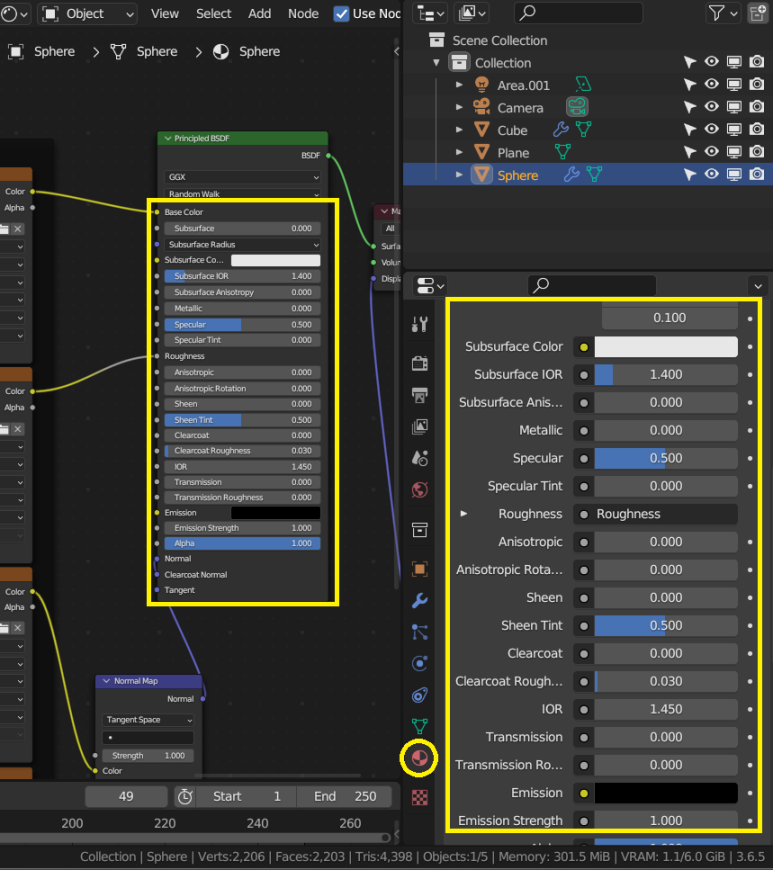
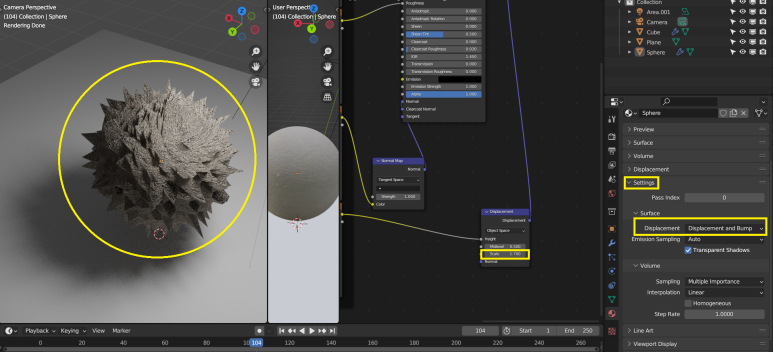
텍스쳐 질감 디테일하게 표현하는 방법
Material Propertie 창에서 Setting
Displacement -> Bump Olny 에서 Displace and Bump로 변경
Displace 값 조절하면 뾰족해짐
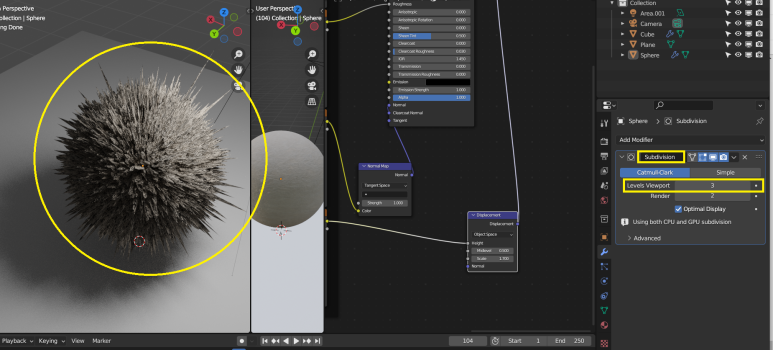
더 디테일하게 뾰족하게 만드는 방법
Subdivision Level Viewport 값 올려주면
더 자잘하게 뾰족해짐
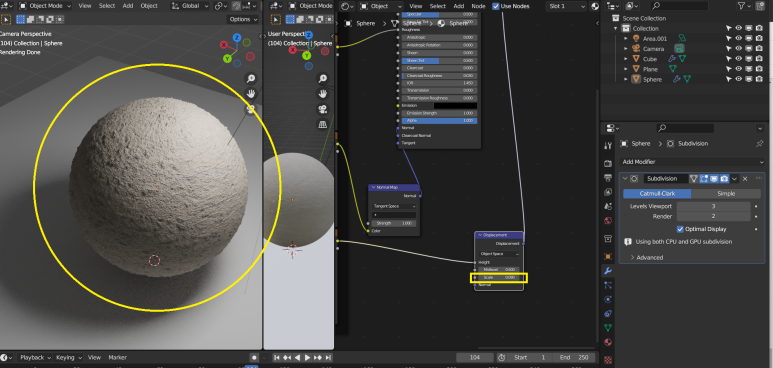
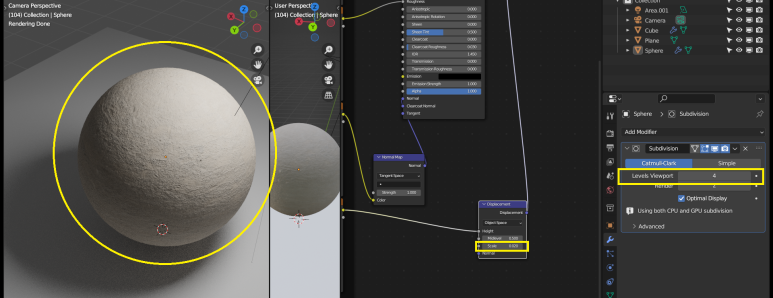
Subdivision Level Viewport 값 올리고
Dispacement 값 내리면
더 사실적으로 섬세하게 질감 표현 가능

'Blender' 카테고리의 다른 글
| 17 조명 종류 및 설정 (0) | 2024.01.04 |
|---|---|
| 16 블렌더 카메라 설정 (0) | 2024.01.04 |
| 14 UV Map으로 투명한 주사위 만들기 (1) | 2024.01.03 |
| 13 노드 추가 및 색상 질감 표현 (2) | 2024.01.03 |
| 12 카메라, 라이트 추가, 렌더링 (1) | 2024.01.03 |


